XLR to Wireless: UHF Plug-On Mic Transmitter & Receiver
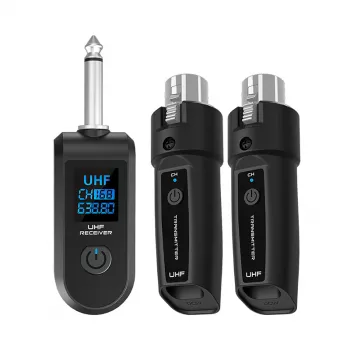
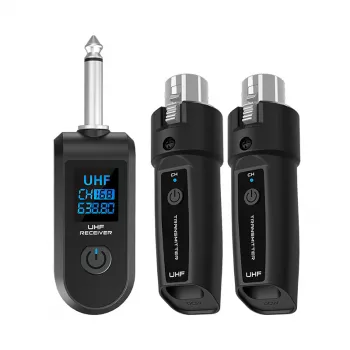
UHF Wireless Microphone Converter XLR Transmitter & Receiver
Turning a wired XLR microphone into a wireless setup can simplify stages, podiums, houses of worship, classrooms, and mobile video work. A UHF microphone converter kit pairs an XLR plug-on transmitter with a matching receiver so a standard dynamic mic can be used without a long cable run, while keeping familiar XLR connections in the signal chain.
What this converter kit does
A UHF wireless microphone converter is built to “cut the cable” without forcing a full microphone swap. Instead of buying a dedicated wireless handheld, you connect your existing XLR mic to a compact plug-on transmitter and send audio over a UHF wireless link to a nearby receiver.
- Converts an XLR microphone signal into a wireless UHF link using a transmitter and receiver pair.
- Helps reduce cable clutter and tripping hazards in live or on-location environments.
- Keeps an XLR-based workflow: plug a mic into the transmitter and route the receiver output to a mixer, powered speaker, recorder, or interface (depending on the receiver’s output type).
- Designed for quick deployment when running cables is inconvenient or impossible.
If you’re ready to go wireless with gear you already own, see the UHF Wireless Microphone Converter XLR Transmitter & Receiver.
Where it fits best
- Live speaking and announcements: podiums, conferences, classrooms, and events where a clean stage matters.
- Small performances and rehearsals: reduce cable runs across tight spaces.
- Video production: simplify talent movement when a handheld mic is preferred.
- Temporary installs: pop-up venues, rental gear racks, community events, and multi-purpose rooms.
UHF wireless can be subject to local rules and best practices. For an overview of legal operation and spectrum considerations, refer to the Federal Communications Commission (FCC) guidance on wireless microphones.
Key parts and typical signal flow
Transmitter
The transmitter connects at the microphone end (often called a plug-on XLR transmitter). It takes the mic’s output and sends it over a UHF radio link.
Receiver
The receiver sits near the mixer/speaker/recorder and delivers the audio output to the rest of the system. Placing it close to your audio input reduces extra cable length and can improve overall stability.
Power and pairing
Both ends must be powered and linked; many kits include a simple channel or pair selection method. A quick pairing check before the room fills up is often the difference between a smooth show and chasing dropouts later.
Audio path example
Dynamic mic → XLR transmitter → wireless UHF link → receiver → mixer input → speakers/recorder
Quick compatibility checklist (before buying or deploying)
| Item to check | Why it matters | What to confirm |
|---|---|---|
| Microphone type | Some converters are better suited for dynamic mics; condenser mics may require phantom power | Whether the kit supports the mic used and whether phantom power is available/needed |
| Receiver output | The receiver must connect cleanly to the next device | Output connector type and whether an adapter is required for your mixer/speaker/recorder |
| Frequency/channel selection | Avoid interference from other wireless systems nearby | How channels are selected and whether multiple systems can operate together |
| Power/charging method | A dead transmitter or receiver ends the session | Battery type, charging port/cable needs, and expected run time for your use |
| Distance and line of sight | Walls and crowds can reduce reliability | Realistic placement of receiver and antenna orientation for the venue |
Setup in minutes
- Connect the transmitter to the microphone’s XLR output and secure the fit so it does not rotate or loosen during handling.
- Place the receiver near the sound system input (mixer, powered speaker, recorder, or interface) to minimize additional cable length and improve reception.
- Power on both units and select the same channel/pairing mode as required by the kit.
- Perform a quick audio check: set gain at the mixer, speak/sing at performance level, and confirm clean signal without dropouts.
- If noise or instability occurs, reposition the receiver for clearer line-of-sight and try a different channel.
Performance and reliability considerations
- Interference management: UHF systems can be affected by other wireless devices, nearby transmitters, or crowded RF environments; changing channels and improving receiver placement often helps.
- Dropout prevention: keep the receiver away from large metal objects, Wi‑Fi routers, and dense power cabling; elevate it when possible.
- Handling noise: secure connections and strain-relieve short patch cables to reduce bumps and connector movement.
- Latency expectations: wireless links may introduce slight delay; for speech it is usually not noticeable, but monitor placement and live foldback should be checked.
- Gain staging: start with conservative input gain to prevent clipping; raise levels gradually while monitoring for distortion.
When working around other wireless systems, frequency planning tools can help you avoid conflicts. For general education and planning references, the Shure Wireless Frequency Finder is a useful starting point.
Using it with common gear
Troubleshooting quick fixes
Care, storage, and on-site best practices
More in-stock picks
- UHF Wireless Microphone Converter XLR Transmitter & Receiver
- 6L Smart Humidifier with Warm & Cool Mist, 60-Hour Run Time, Alexa Compatible
- Multi-Tiered Plant Stand – 11 Pot Indoor Flower Shelf, Tall Metal & Wood Rack
FAQ
Will it work with any XLR microphone?
It will work with many standard XLR dynamic microphones, but compatibility can vary. If you plan to use a condenser mic, confirm whether the converter provides phantom power (or whether your workflow can supply it elsewhere) and that output levels match your mixer or recorder.
How far can the transmitter and receiver be apart?
Range depends heavily on the space: line-of-sight typically performs best, while walls, crowds, and metal structures reduce reliability. Place the receiver high and clear when possible, then do a quick walk test to verify usable coverage.
Can multiple systems be used at the same time?
Often yes, as long as the kit supports multiple channels and you plan frequencies to reduce interference. Keep transmitters separated, avoid stacking receivers too closely, and choose channels with enough spacing for stable operation.













Leave a comment